Welcome to our July
Art Philosophy Blog Hop! Each month we will showcase a feature of the amazing
Art Philosophy Cricut cartridge which can be purchased exclusively through a Close to My Heart Independent Consultant.
We're so excited to be doing this hop and we have a fabulous lineup with some very talented ladies. There will be lots of fun projects AND some blog candy!!!
Lucy Kelleher, our hostess and fellow CTMH Consultant, will be giving away a stamp set! She is giving away a prior Stamp of the Month set that can no longer be purchased called "You Are ...". (This stamp set has a $17.95 retail value). You will find a picture of the stamp set on her blog.
To enter to win, you will need to leave a comment on her blog and on every stop of the blog hop. If you also become a follower of Lucy's blog, she will give you another entry . This month we will be showcasing the "Card" feature of the
cartridge. Did you know there are 100 different card shapes you can make with this cartridge? You heard me correctly -- 100!!! Now we won't be able to show you ALL 100 card options, but we will show you as many as we can.
If you just happened to come to this blog, you should start at the beginning at
Lucy's blog -
http://www.love2createitall.com/.
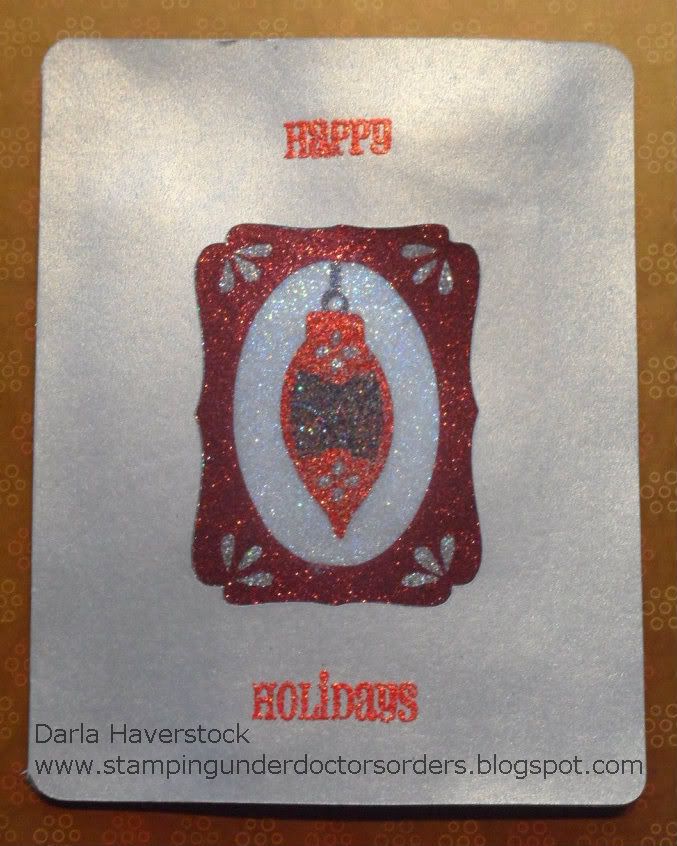
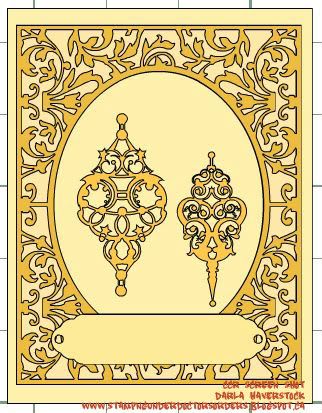
My project today uses the card feature key on page 47 (without the shift key) which is the 3rd row down 7th key over (going left to right) of the white image keys on your keypad.
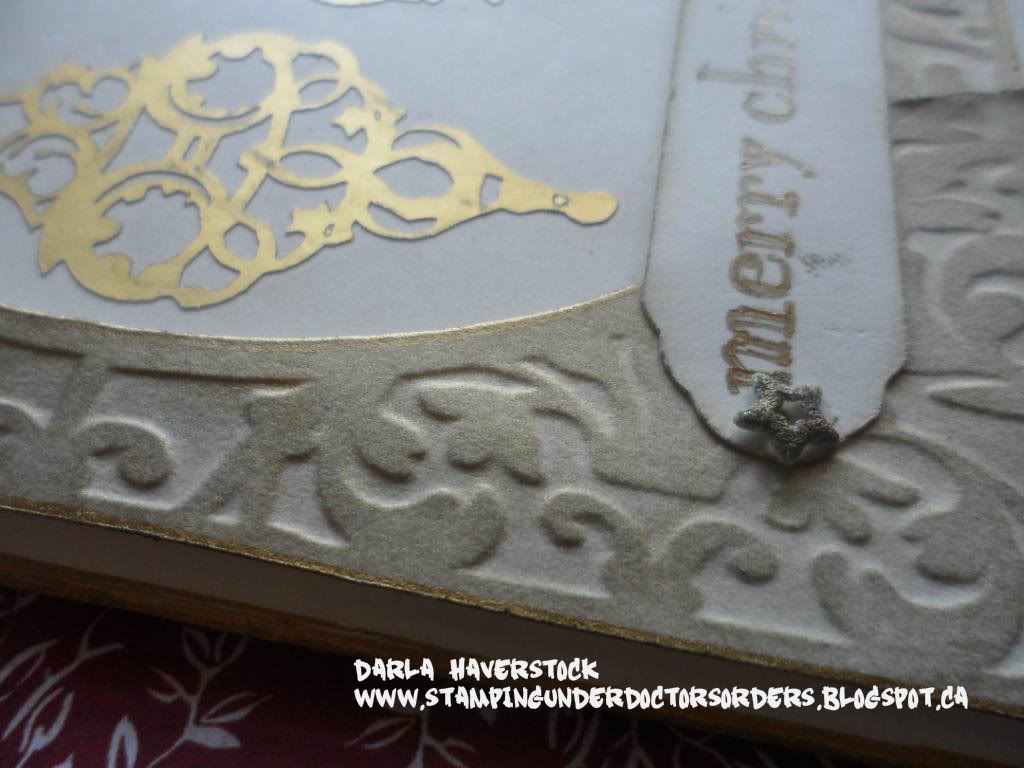
First.. a close up of the glittery goodness!! :)
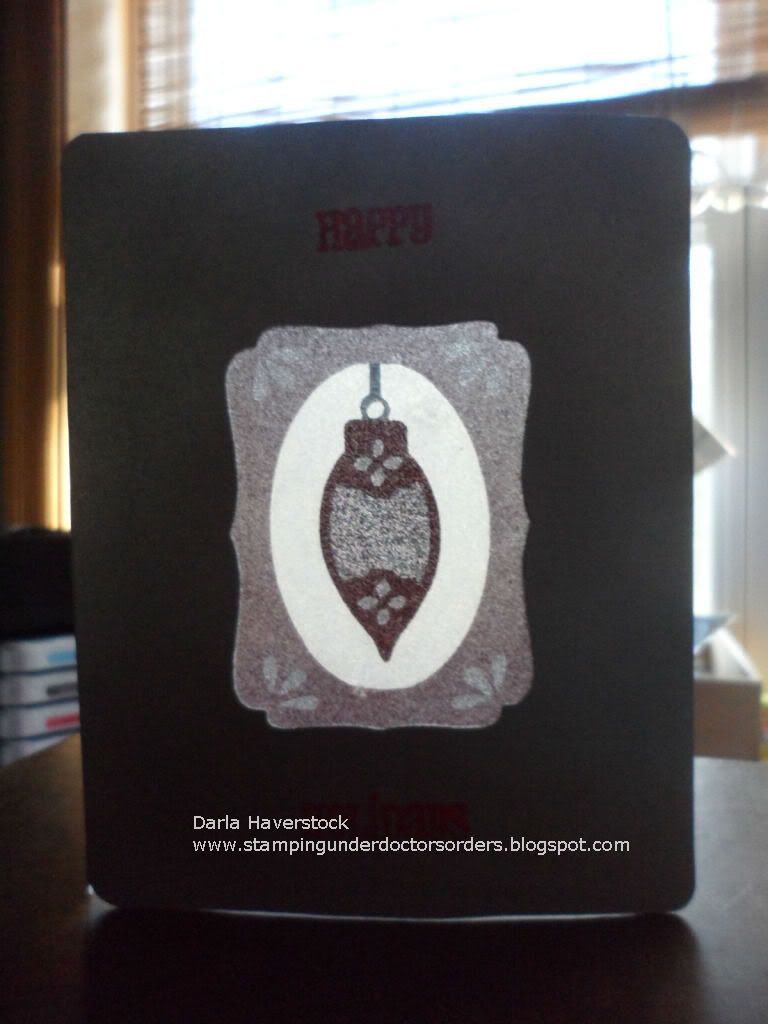
Here's what the whole card looks like from the front:
Now.. just to show you that this really was the card shape which has a cutout window in the middle of the front panel and not just a plain card with this stuck on it (and because I thought the picture looked really neat)... here's a shot of my card open in front of a window so you can see that you can see through it. :)
Here's how I achieved this look.
First I made my file in Cricut Craft Room so all the pieces would line up and cut in the correct spot as well as I was able to play with the colours to decide which ones I wanted to use.
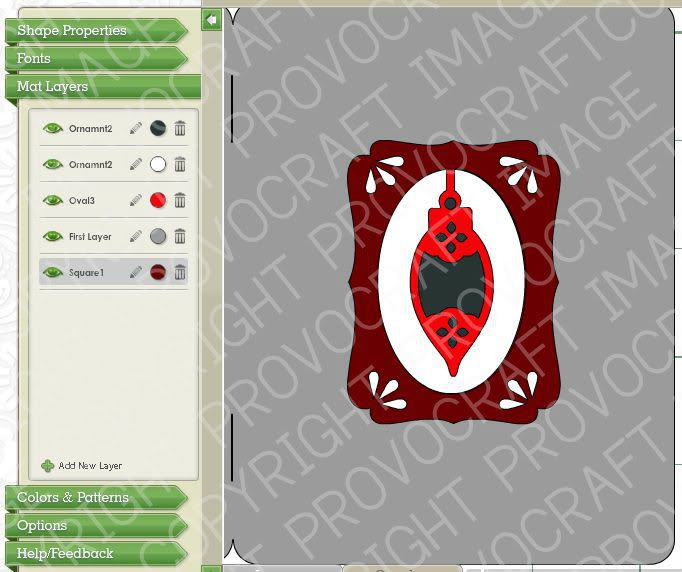
Next I loaded my silver paper (the paper I used was Reflections cardstock from Michaels) and cut the card shape @ 5.5" using CCR. Then I took a piece of acetate which I had applied a piece of Scortape to first and with the mat still loaded in the machine i carefully lifted the cut card shape up on the side with the cutout and ligned up my piece of acetate with the acetate side on the mat and the tape backing facing up so that it would cut the pieces in middle of my acetate 9yes I could have just cut a bigger piece and put t in approximately the right spot since CCR shows you where on the mat it will cut but this way I knew exactly how much edge I would have on the acetate around my shape). I cut all oth the layers for the ornament and the label shape like the opening in the card front with my setting on 4 speed, 4 pressure, 4 blade depth and a mulitcut of 2 since the kind I used was BCT tape which has a very thick backing on the tape.
Now I had my card shape cut from the silver card and a solid square of acetate with adhesive on it and all the pieces cut out of the tape backing.
I removed the tape backing on the outer edge leaving all of the part you can see through the window cut opening of the card covered. and lined it up with my card from behind and stuck it on. now i just removed one section of backing at a time and applied my glitter to the exposed adhesive rubbing it on really well with my fingers and then using a shaving brush to brush away all the excess glitter.
I used my
Say it in Style stamps (which is no longer available as of August 1 so make sure you order ASAP if you want this amazing set of sentiments) to stamp the sentiment in versamark ink and heat emboss with red tinsel embossing powder.
The next stop on your blog hop fun is
Gloria Shirr so hop on over and see what wonderful project she has to share with you today! :)
Here is the list of all the talented consultants who are participating in this months blog hop:
- Lucy ~ Love2Create
- Darla ~ Caution: Crafting is Contagious!
- Gloria Shirr - Purpleglo Creations
- Laura Wolff- Scrappinsweetie's Escape
- Eva-For the Love of Creating
- Danielle ~ Little Bit of Scrap
- Connie ~ Connie's Crafty Closet
- Wendy ~ My Scrapbooking Blog
- Joanne - Josie's Joy
- Laura Charko - Koala Designs
- Carolyn Heniges - Nuts 4 Scrappin'
- Kindred Hearts (Penny) - It Makes Total Cents
- Stephanie Feist- The Quilted Scrapper
- Julia Hammond You Can Create
Thanks so much for stopping by and hopping with us - we hope you LOVE all the projects we created!