Saturday, September 29, 2012

Take a Walk in the Moonlight


Thank you for joining us on our “Take a Walk in the Moonlight” Blog Hop. We have a fabulous path for you to follow as you take your walk in the moonlight with us as we feature Close to My Heart’s Moonlight paper pack.


If you just happened to come to this blog, you should begin your walk at the beginning at Lucy's blog - Love 2 Create.

Yesterday was my cousins 22nd  birthday so I made her a birthday card using the Moonlight Paper some Black Cardstock and the Artiste Cartridge.


It started out looking like this.. but it just needed a little something more.. don't you think?


So I blinged it up a little with some silver marker. Which version do you like better?


This card is a gift card holder. I just love that this cartridge has all these fantastic cards on it. Here's the inside with a cute gift card for Chapters:


You can find this gift card holder in the Artiste Cartridge handbook on Page 59 Card Feature Key :


Products Used:


The next stop on your moonlight walk is Deanne Treasured Heart.


Here is the list of all the talented consultants who will lead you down the moonlight path:

  1. Lucy ~ Love 2 Create
  2. Darla ~ Caution: Crafting is Contagious
  3. Deanne Treasured Heart
  4. Bethany ~ Stamping At Home
  5. Wendy ~ My Scrapbooking Blog
  6. Stephanie ~ The Quilted Scrapper
  7. Erin ~ CreatErin
  8. Maria ~ Maria's Paper Craft Place
  9. Carolyn ~ Nuts 4 Scrappin'
  10. Joanne ~ Josie's Joy
  11. Julia ~ You Can Create
  12. Theodora ~ Celebrate Crafts
Products Used:


Saturday, September 22, 2012

September ARTISTE Blog Hop


Welcome to our September ARTISTE Blog Hop! Each month we are showcasing the amazing, exclusive ARTISTE Cricut cartridge which can be only purchased through a Close to My Heart Independent Consultant.

We don't want to scare you but Halloween is a little over a month away and we know you have to be thinking about what YOU are going to create for this spooky holiday! We decided to show you all the creative projects you can make using our exclusive Artiste Cricut cartridge. You will be hopping along our haunted trail of creativity - you never know what you will see next!

If you just happened to come to this blog, you should start at the beginning at Lucy's blog

Also, to help you get ready to start making your own Halloween projects Lucy has some blog candy for you! She is giving away a Moonlight Complements Dimensional Elements pack! That's two (2) sheets of Printed Dimensional Elements that you can use to create your own Halloween project! There is a picture of the blog candy on her blog. All you have to do to be eligible to win is to leave a comment on everyone's blog AND become a follower of Lucy's blog. (If you are already a follower, just let her know in your comment.)

Okay.. first I need to apologize. If you came to visit my blog earlier blogger apparently did not keep all the updates I did to my post so all you saw was a Christmas themed project. I'm sure you all had thought I lost my mind! 

The truth is I was working away on my project for this hop and looking through the handbook I got excited to try the holder you will see below and I wanted a bunch of cards to put in it so I pulled out my Pear & Partridge Workshop On The Go Cardmaking Kit and got working on the cards. I also didn't like the plain squares so as you will see below I switched it out for a shape from the Artiste cartridge as well.

Now.. 2 days ago I was going through the hop write up and editing my post for you all when I realized that I had completely ignored the hop theme "Halloween" so a complete re-do was in order! I edited the whole thing and re-scheduled it to post but apparently blogger really liked my Chrsitmas project as it reverted the whole post back to that. Good new is now I'm going to show you both today instead of saving the Christmas one for tomorrow like I was going to had blogger cooperated. :)

I decided I still wanted to use the same concept.. so I switched out the Pear & Partridge B&T for the 
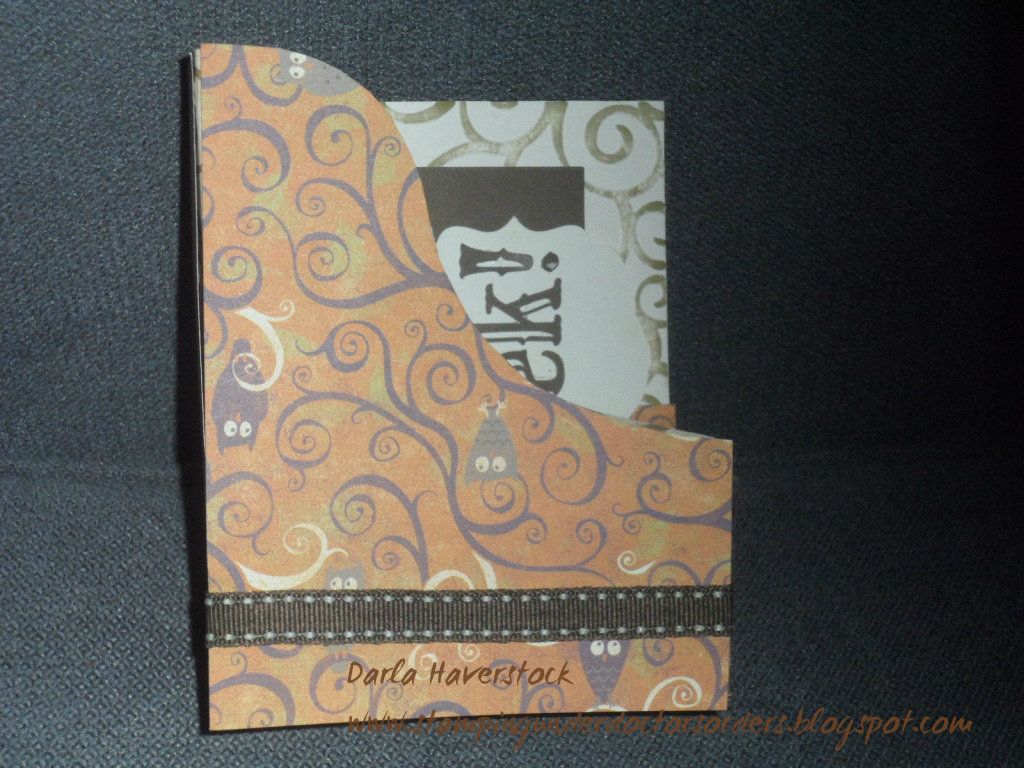
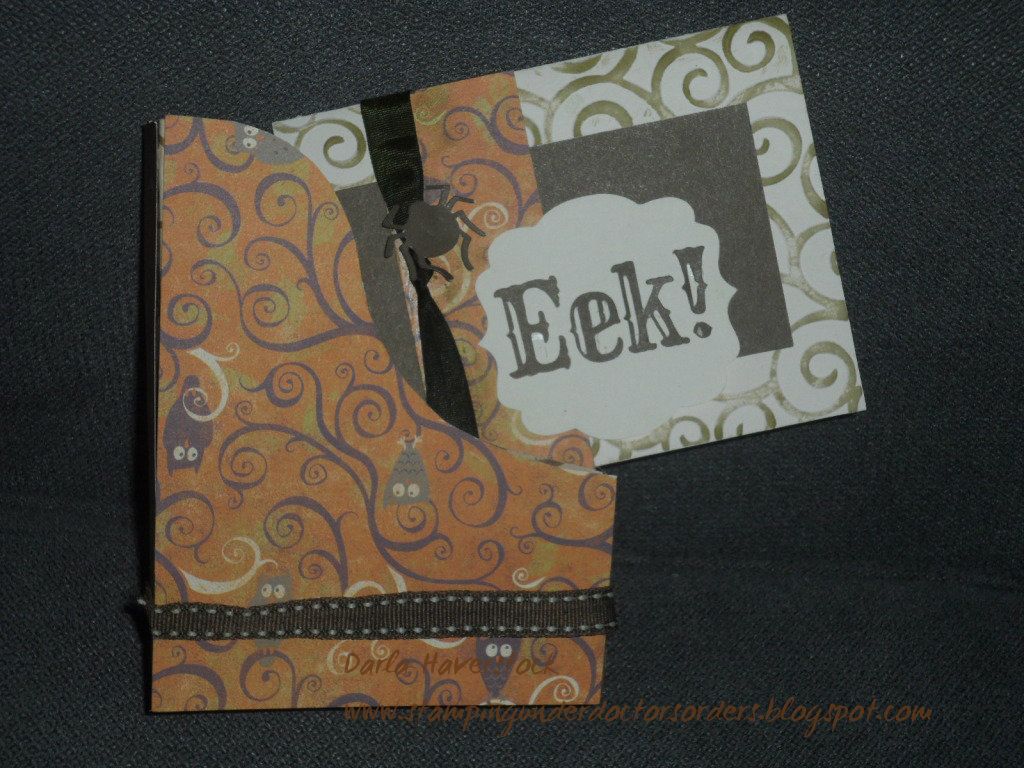
Moonlight B&T. I embossed my card base and ran my cocoa ink pad over the embossing to highlight it and instead of using stamps I cut the phrase "Eek!" from page 76 of the Artiste handbook and I also added the spider (accent 4 with shift on page 77) cut from more of the same left over cocoa cardstock from the Pear & Partridge Workshop On The Go Cardmaking Kit, seriously I wonder how many more projects I can make from this kit?? I added some color ready seam binding that I died with the Olive stamp pad and eur"eek"a a Halloween themed project to share for you.

Here are some pictures of my Halloween theme card and holder set:


Now for more details on the shapes and to see what the Christmas themed one looks like and how easy it was to switch just scroll down and you can see my post that anyone that came this morning saw as well as you will find the hop lineup and your next stop at the end.

Let me know which one do you like best??

If you don't want to see the Christmas one and just want to be on your way to the next stop.. The next stop on the haunted trail is Diana - Dianas Free Moments and you're going to love what she has for you.
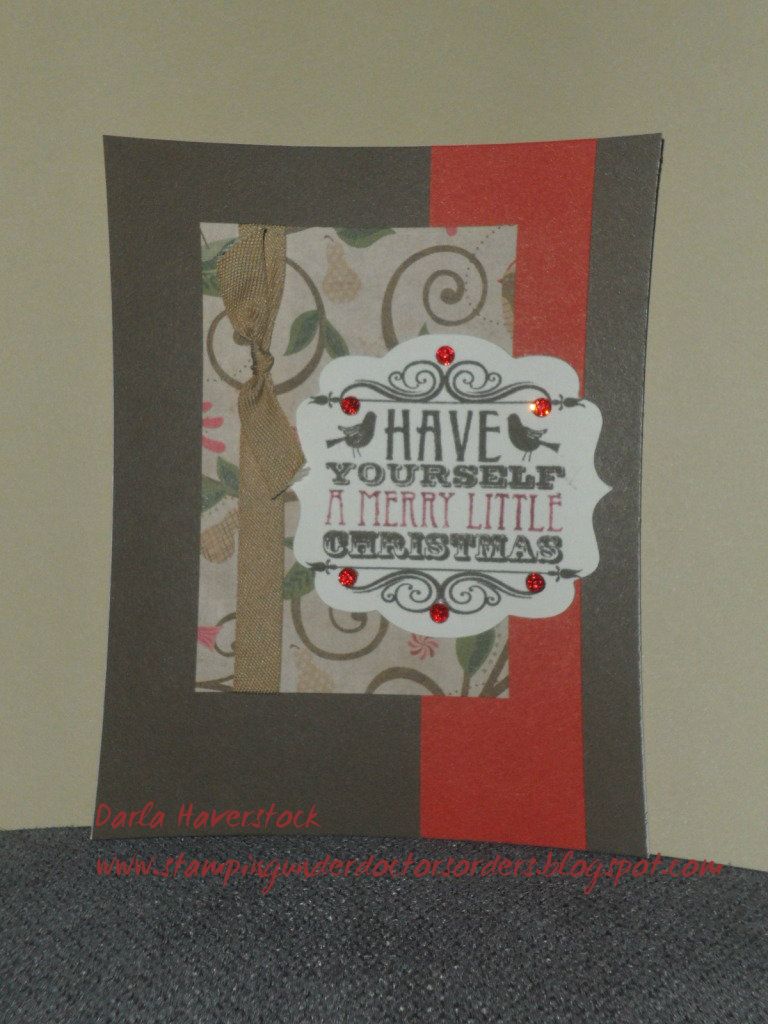
Today I used the Pear & Partridge Workshop On The Go Cardmaking Kit and essentially used the projects exactly as the workshop instructions that come in the kit say to.. except I found the plain squares for the focal images boring so I used the Accent 3 shape from page 61 of the Artiste Cricut Cartridge for 2 out of the 3 card designs in the kit.


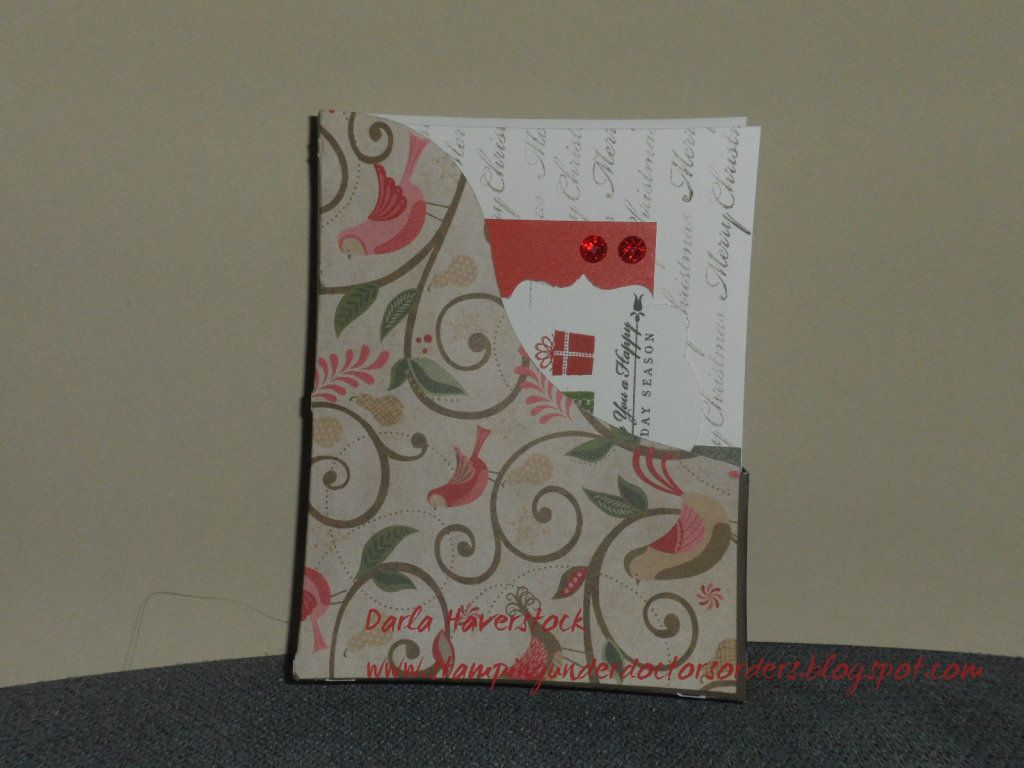
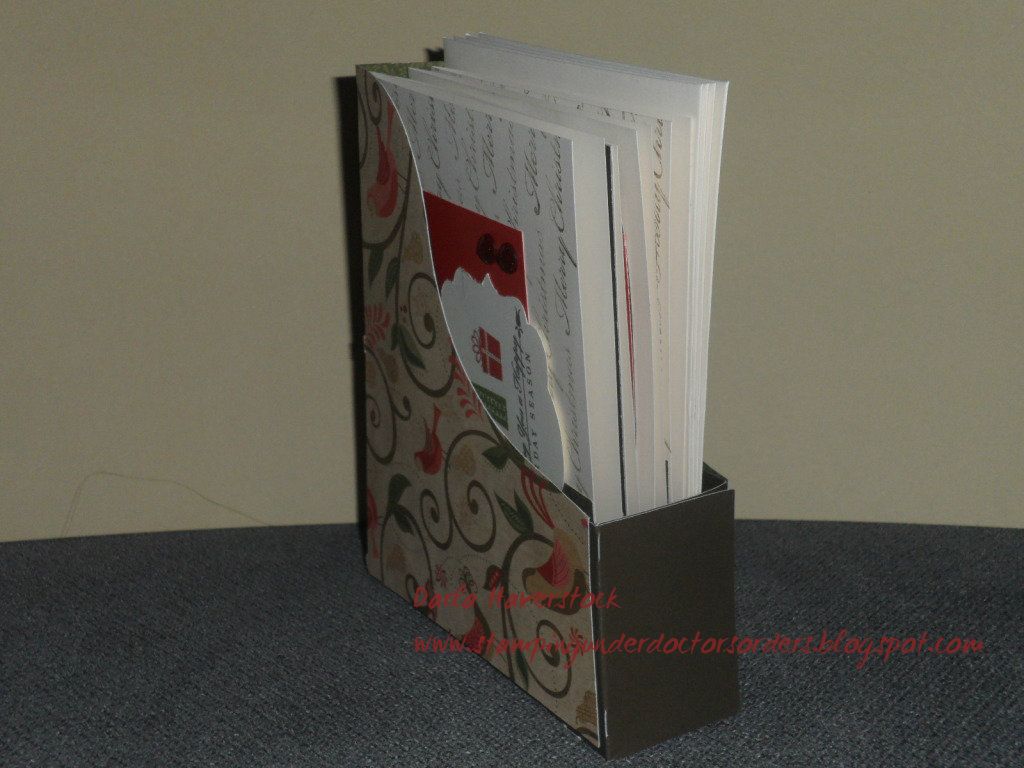
I also added a little holder for all the cards using the paper left in the package after making all 15 of these cards, yep... you heard me.. there was paper left over and actually still is a bit left after making the holder.


For the holder I cut the Accent 3 shape on page 47 of the Artiste Cartridge from my left over Pear & Partridge B&T from this kit and the Accent 3 with the shift key on page 47 of the Artiste Cartridge from the left over Cocoa cardstock from the kit. I think I will embellish the holder a bit more... maybe add some ribbon and bling! :) What do you think?
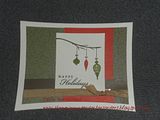
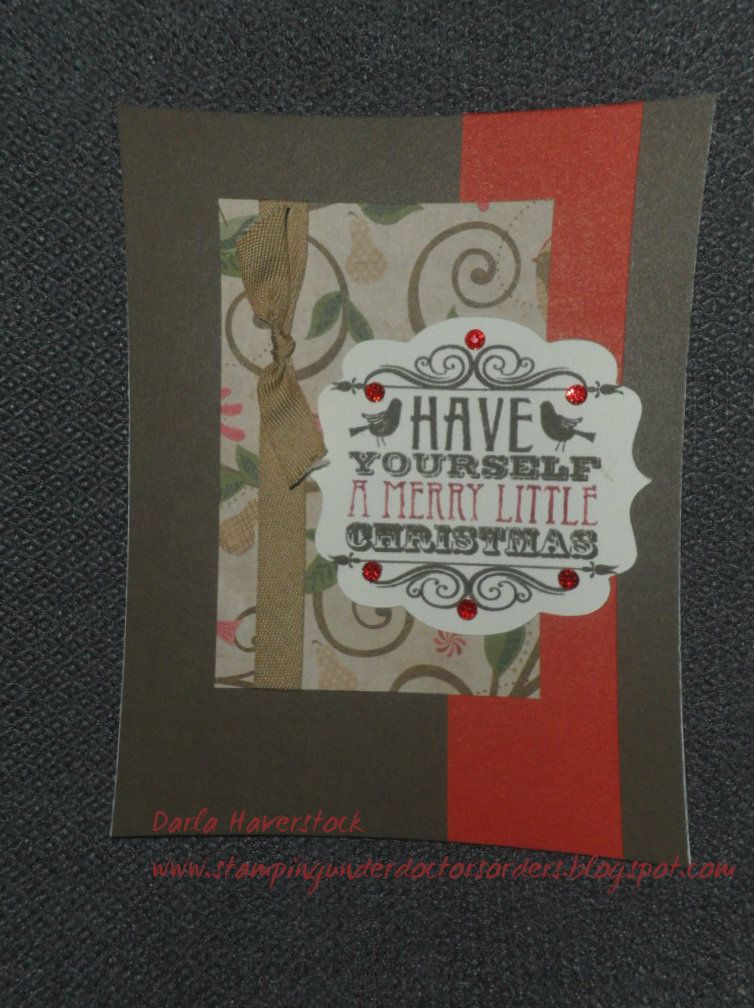
I used the Cranberry marker to ink the "A MERRY LITTLE" on this card instead of cutting out a seperate piece and masking it and inking in the cranberry ink I just found this went faster.

I just love the stamp set that came in the Pear & Partridge Cardmaking Kit as well. It's so cute and versatile! It has 6 sentiments (one being that lovely one with the birds and filigree on it to be used as a focal image), 3 different present, 3 different ornaments, the string for the ornament, 2 partridge birds and a branch. I can see myself grabbing this set a lot.


Products Used:


The next stop on the haunted trail is Diana - Dianas Free Moments

Here's the entire blog hop lineup in case you get spooked along the way:

  1. Lucy - Love 2 Create  Previous
  2. Darla - Caution Crafting is Contagious You are here
  3. Diana - Dianas Free Moments Go here next
  4. Carolyn - Nuts 4 Scrappin'
  5. Julia Hammond - You Can Create 
  6. Wendy Kessler - My Scrapbooking Blog
  7. Pam Stewart - I Candy Scraps
  8. Carolyn Mendoza - Crafting With Carolyn 
  9. Jennifer Kramer - 4 Hearts Scrapbooking 
  10. Maria Woodworth - Maria's Paper Craft Place 
  11. Kindred Hearts - It Makes TOTAL Cents
  12. Ginger Morriello - Ginger's Creative Cottage 

Thanks for stopping by for some Halloween fun -- hope we didn't scare the creativity out of you! Muah-ha-ha!

Saturday, September 15, 2012

September Art Philosophy Blog Hop


Welcome to our September Art Philosophy Blog Hop! Each month we will showcase our amazing Art Philosophy Cricut cartridge which can be purchased exclusively through a Close to My Heart Independent Consultant.

Since Halloween is just around the corner, this month we will be featuring projects for Halloween made using the Art Philosophy Cricut cartridge! Hope you don’t get too scared by the time you get to the end of our hop!

If you just happened to come to this blog, you should start at the beginning at Lucy's blog - Love 2 Create.


For this hop I made a couple projects.. the first was a set of labels for some homemade green tomato chow chow.  I just love these (the labels.. not the chow chow)!!

They turned out so cute and I think I'm going to label all the pickles and chow chow in our house with these since it's a bit of a running joke in our house as everyone else LOVES them and I can't stand the smell of them enough to even open the bottle to put some on the kids plates.

Since my family has such a lovely sense of humour, I get handed the bottle of whatever is on the table (pickles, mustard pickles, chow chow, etc) and asked if I would like some.  Let's see how appetizing they find them with their new labels.. LOL

I used D1527 - Perfect Fit Frames stamped in Gypsy ink on labels cut out using the Art Philosophy cartridge shape on page 67 as indicated on the stamp carrier sheet and C1509 - Magic Potions in Autumn Terracotta ink on labels cut out using the Artiste cartridge shape on page 36.


I also had this set of candles around that was gathering dust and thought the colours (although the picture really doesn't show this very well) were very Halloween like so I decided to add a border from the Art Philosophy cartridge on page 65 in chocolate card stock to make them Halloween themed. I'm not 100% satisfied with these and you may see these again some time with some more cuts added (I'm thinking spiders, skeletons... maybe a few 3D pumpkins around them). Either way I do like how they turned out. They definitely look a little more theme suited now anyways. :)

What do you think?

BEFORE:
 
AFTER:


The next stop on your spooky blog hop trail is Diana over at Diana's Free Moments


Here's the entire blog hop lineup in case you get spooked along the way:
  1. Lucy - Love 2 Create 
  2. Darla - Caution: Crafting is Contagious!
  3. Diana - Diana's Free Moments
  4. Stephanie - The Quilted Scrapper
  5. Julia - You Can Create
  6. Wendy Kessler - My Scrapbooking Blog
  7. Carolyn Mendoza - Crafting With Carolyn
  8. Kindred Hearts - It Makes Total Cents
  9. Rebecca - Stamp and Scrap Studio
  10. Maria Woodworth - Maria's Paper Craft Place
PRODUCTS USED:

Saturday, September 8, 2012

Fall Favorites SOTM Blog Hop


Welcome to our September Stamp of the Month Blog Hop! This month Close to My Heart is offering a stamp set called "Fall Favorites". This set can be purchased exclusively through a Close to My Heart Independent Consultant for only $5 with a qualifying purchase of $50.


In this hop, you will see projects featuring this fun stamp set from many talented crafty ladies! We hope you enjoy our blog hop today!

If you have just hopped onto my blog, please start at the beginning at Lucy's blog: Love 2 Create .   If you just came from Lucy's blog then you are on the right track. :)


My Project Details:

My mother-in-law sent a wonderful wiper card with Tinkerbell on it for my daughters 1st birthday, so when I sat down with this stamp set I decided I really wanted to try making a wiper card myself. :)


Now the big challenge I had was figuring out measurements since every tutorial I could find when I did a google search brought up measurements for making an A2 (4.25 x 5.5) card landscape and I needed it to be portrait for this card and when I kept the sides the same as the tutorials said it looked very strange and awkward so I had to play with this a lot. The sentiment I wanted to use also wouldn't fit on the wiper part so I changed the dimensions of that too and then inked part of my sentiment and stamped it and then inked the last part of my sentiment and stamped it below that.

The ink I used for the sentiment is Barn Red which coordinates perfectly with the Dakota B&T I used . I used one of the new colours "Cashmere"to stamp the scarecrow image and the pumpkin image on the wiper and then I wanted to colour it with my watercolour pencils but could not for the life of me find them in my messy craft area so I used chalks instead.

I cut the frames to make the opening reveling the card underneath where I stamped my image from the Art Philosophy cartridge in Cricut Craft Room (of course) but you could just use center point on your machine and cut the label shape first and then the rectangle using the same center point coordinates. The letters are cut out of the piece I cut out from the middle of the frame using the Artiste cartridge.

The card doesn't really "open" but when you pull the card front to the right and the back piece to the left the wiper piece pops up from the middle.

Here's how it looks as you "open" it.. (closed, half way and all the way).


Isn't the main image stamp just too cute?! I love that this set has a single bird, and the pumpkins as a separate image as well as some great fall words and sentiment. Love it!! You can get this fantastic stamp set "Fall Favourites" for just $5 with a $50 order plus you would also qualify to get the double stamp set "It's Your Day" for National Stamping Month (which you can see pictures of and a great blog hop full of ideas for in my previous post here) for $5... that is an absolutely incredible deal! :)
.


Your next stop on the Fall Favorites Stamp Set Blog Hop is  Shelly Mendenhall of Inky Wheeler's Artsy Musings


Here is a complete list of the blog hop in case you get lost along the way:

  1. Lucy :  Love 2 Create You came from here
  2. Darla : Caution: Crafting is Contagious! You are here
  3. Shelly Mendenhall : Inky Wheeler's Artsy Musings  Go here next
  4. Eva Friesen : For The Love Of Creating
  5. Judith Ashmore : My Blog Adventure
  6. Stephanie : The Quilted Scrapper
  7. Tina Gale : My Scrappy Ideas
  8. Maria Woodworth : Maria's Paper Craft Place
  9. Jennifer Kramer : 4 Hearts Scrapbooking
  10. Carolyn : Nuts 4 Scrappin'
  11. Madeline Morcelo : Inking From The Heart
  12. Theodora : Celebrate Crafts
  13. Laura W. :  Scrappinsweetie's Escape
  14. Michelle Stewart : My Creations With Michelle
PRODUCTS USED:

Saturday, September 1, 2012

National Stamping Month Blog Hop

Good morning and welcome to our National Stamping Month Blog Hop. At Close to My Heart, we want to celebrate the everyday moments in our lives. Close to My Heart is doing that by offering an amazing exclusive double-stamp set called “It’s Your Day”. This is two D-size stamp sets in one!!

This amazing set has nearly 50 images designed to inspire you to capture your life one day at a time. There are trendy chevron backgrounds, classic images as well as versatile phrases. You can get your own stamp set for only $5 with a qualifying order of $35. This stamp set has a value of $35.90!

We also are happy to announce that one of our consultants, Maria Woodworth, of Maria's Paper Craft Place is offering blog candy. To be eligible to win, please be sure to leave a comment on each blog post and become a follower of her blog. Thanks so much Maria!


We're so excited to be doing this hop and we have a fabulous lineup with some very talented ladies. There will be lots of fun projects.

If you just happened to come to this blog, you should start at the beginning at Lucy's blog.

Also, make sure you follow the entire hop as you might just find some candy along the way. ;)


 I decided to make a quick easy card with NO cricut cuts on it!! Yup.. you heard me right.. NO CRICUT! ;)

I used the same stamp in a repeat patterm with Pacifica and Creme Brulee.

Hope you like it.


The next stop on your blog hop fun is Lori's Blog  who I have been a follower/fan of for quite a long time now.

Here's the entire blog hop lineup in case you get lost along the way:
  1.  Lucy ~ http://www.love2createitall.com
  2. Darla ~ http://www.stampingunderdoctorsorders.blogspot.com/
  3. Lori B ~ http://savingmine.blogspot.ca/
  4. Amie Kiger~http://www.mimimyselfandibykigz.blogspot.com/
  5. Deanne J - http://deannestamps.blogspot.com
  6. Jennifer Kramer- http://4heartsscrapbooking.blogspot.com/
  7. Carolyn ~ http://www.nuts4scrappin.blogspot.com
  8. Bethany - http://stampingathome.blogspot.com
  9. Eva Friesen ~ http://loveofcreating.blogspot.com
  10. Maria Woodworth ~ http://mariawoodworth.blogspot.com
  11. Julia Hammond ~ http://youcancreatectmh.blogspot.com/


Get widget