Wednesday, October 31, 2012

Happy Halloween!!!

Happy Halloween everyone!!

I thought I'd share a photo of my son wearing (yes wearing) the skull table decoration I made from the digital cartridge Happy Hauntings-3D Skull) from a party we went to on the weekend.

I'll share some photos of the kids in their "real" costumes tomorrow. :)

Saturday, October 27, 2012

The Artiste in 3D Blog Hop


Welcome to our The Artiste in 3D Blog Hop!  There are so many fun features  in our Artiste Cricut cartridge that we decided to showcase many of the 3D Objects


In this hop, you will see a variety of projects featuring the 3D Object key of the Artiste but don’t worry, you won’t need special glasses to see them!  (But we do hope our projects will “stand out” to you.)

If you have just hopped onto my blog, please start at the beginning at Lucy's blog – Love 2 Create.   If that's where you came from then you are in the right place!

For my project today I wanted to show how you could make some very quick but beautiful home decor.


I cut the 3D object from page 53 from acetate at 5.25" as well as 2 of the shifted Accent 4 image on page 53 and 2 more of the same image with the flip function on from gold cardstock at 2". I folded all 4 of these ornaments down the center lengthwise and stuck them to each other back to back around in a circle matching up the right side of a regular cut with the left side of a flipped one. Before I glued the last one in place I took a piece of stretchy jewelry cord (you could also use fishing line, this is just what I happened to already have) and laid it into the middle of the cut then glued the last to sides together.

The garland is just some outline stickers I've had laying around for years. This could easily be substituted with absolutely anything including a nice stitch stamp or border stamp in gold staz-on, glitter glitz, viva decor pen.... you get the idea.

I used a needle to thread the other end of the cord up through a gold bead and then up through the top of the tree. I used another larger green bead on top and once I had my ornament hanging at the height I wanted I tied it off to this bead. I think I will actually use a gold bead on the top too for the next one. You may also notice a slight green tint to the plastic... there is a reason for that.. LOL I tried to photograph this except the clear plastic just did not want to take a nice photo so I grabbed some green alcohol ink and some alcohol and sprayed a mixture of the two into the inside of the tree (without the ornament of course) and wiped it around a bit just to give the plastic a hint of colour so it would photograph.

Here's a shot in slightly different lighting:

Products Used:

Your next stop on the Artiste in 3D blog hop is Stephanie - The Quilted Scrapper.

Here is the complete lineup in case you get lost along the way:

Thanks for hopping along with us - we hope we were able to inspire you to create your own 3D projects with the Artiste.

Saturday, October 20, 2012

Autumn with Art Philosophy Blog Hop


Welcome to our Autumn Art Philosophy Blog Hop!
Each month we are showcasing our amazing Art Philosophy Cricut cartridge which can be purchased exclusively through a Close to My Heart Independent Consultant.

It's the time of year where leaves are changing colors, temperatures are dropping, the days are shorter, and the holidays are quickly approaching. This month we will be featuring projects with an Autumn theme made using the Art Philosophy Cricut cartridge!

If you just happened to come to this blog, you should start at the beginning at Lucy's blog - Love 2 Create. If you came here from Lucy's blog - Love 2 Create, then you're in the right place!


I decided to create stencils to make my background using some of the leaf and branch cuts from the Art Philosophy Cricut cartridge. The images I used can be found on pages 34, 43, 56 and 62.

Here's a photo of my finished project:


I used the Art Philosophy Cricut cartridge in Cricut Craft Room to make a stencil for the background. I used Kraft cardstock and Colonial White. I used the Remarkable Wreath stamp set and stamped the wreath base in Chocolate ink and then inked the leaves for the wreath in Goldrush and then just tapped it randomly against the corner of my Barn Red stamp pad to give it a variegated effect. I then stamped the sentiment in the center using the Barn Red again.
I used my sponge daubers and the same ink colours on my background layer with the stencils I made (more info on how I did this below), you could also use the round sponge for this too. I popped my layer of kraft with my main image on it up on foam tape to give the card a bit more dimension.

If you want to skip my little tutorial on the stencils for the background then your next stop on the hop is Diana - Dianas Free Moments, although I'd love for you to scroll down and leave me a comment on what you think before you go. ;)

If you stayed to see my tutorial... Here's how I made my background:

I laid out my entire layout how I wanted it to look using the layers in Cricut Craft Room. It's great doing it this way since you can change your colours around and everything of your layers so you can really see how the end project will look. I also added a larger rectangle with 2 circles in the top corners on each of the leaf layers (I have kept these out of the screen shot because once you add these you can't see your leaves anymore and I wanted you to see how it looked all laid out so I have put this same rectangle and circles on a seperate layer in blue behind everything so you can see what I mean. I used this rectangle and circles to align my stencil correctly (which you will see in the step by step photos). You can see that I also put some branches around in a circle to symbolize the stamp I used.


I also cut one of those same rectangles with the circles out of it with the colonial white rectangle for my pattern as well. This allowed me to stick that down on my craft mat and then I could put my cut cardstock in the opening so I knew everything would line up exactly as it did on my screen.


Now I used the circles to line up my layer that was red on my CCR screen which was a rectangle with the circles and all the red leaves cut out of it, and then I sponged my Barn Red ink through the stencil, knowing it would end up in exactly the same place on my background as it was on my screen. I love this technique!!


Then I removed my barn red stencil and put my stencil from the yellow layer on lining it up with the circles again I then sponged my Goldrush ink through the stencil.

You can see my barn red one off to the side here after I removed it and my Goldrush one still in place but after I inked it.


NOTE: you do not want to rub your sponge dauber but rather use a stippling straight up off your stencil and then straight back down.. if you rub then you will distort your stencil.
Here's the finished background piece still in the placement holder after removing my goldrush stencil:

Finished project again:


The next stop on your trail of falling leaves is Diana - Dianas Free Moments

Products Used:


Here's the entire blog hop lineup in case you "fall" off the path:
Lucy's blog - Love 2 Create
Darla - Crafting is Contagious
Diana - Dianas Free Moments Go here next
Stephanie - The Quilted Scrapper
Amie - Mimi, Myself, and I
Jennifer - 4 Hearts Scrapbooking
Rebecca - Stamp and Scrap Studio
Kindred Hearts - It Makes Total Cents
Theodora - Celebrate Crafts
Arlene - Arlene's Creative Space
Amanda - Scraps Of Love
Priscilla - Priscilla's Paperie
Ginger - Ginger's Creative Cottage
Michelle - My Flights of Fancy

    Thursday, October 18, 2012

    WIN a complete set of PROMARKERS over at Going Buggy


    Go over to Going Buggy to see the details and enter to win a complete set (that's 144 markers) from Letraset.
    I actually have a few of these markers myself and absolutely love them!!

    Tuesday, October 16, 2012

    Happy Birthday Dejah and Carousel Rubber Stamps

    Feel free to just go check out the pretty pictures, but if you're curious how this came about by all means read on... ;)

    My cricut has really taken over my cutting/crafting time since I got my Art Philosophy cartridge and since I added the Artiste one to my collection well it's been even more so.

    The fact that I teach cricut classes has really been my excuse for using it so much and ignoring my poor KNK Groove and my craftrobo.

     I did use my craftrobo when I did my couisins baby announcements (more on those in another post) because of the ease of the print and cut feature on it. My KNK Groove got used a little when I did some vinyl text for a business for their vehicle.

     Well... Carousel Rubber Stamps where I teach most of my cricut classes at was celebrating their 18th birthday and the owner, Dejah's birthday is the same week as the store (we'll just say she was 29 again). ;) They hold demo days every month where the staff and guest instructors go in and demonstrate different products or techniques and on the weekend around the stores birthday they always have a larger demo day with cake and extra special make n takes and lots of fun to be had!! In addition this year they took all the cards that were brought in for the birthday of the store into a draw for a gift certificate. Of course I saw this as the perfect opportunity to use my software cutters. I really wanted the card to somehow symbolize the store and the fun had there, so I found a site that has PDF eBooks of pop up card patterns, one of which was a 3D carousel or merry-go-round. Perfect!!

    I purchased the eBook and opened my funtime software to import the PDF only to discover that it was a secured PDF and funtime would not import it... grrrrrrr..... oh well.. KNK Studio to the rescue!! I opened KNK Studio and imported it no problem! :) After cleaning up the file a little bit here and there I cut out the 28 pieces required to assemble the carousel. In case at this point you're wondering what site I got the file from it was amazingpopup.com .

    I used my gold pen to edge every piece in gold and then put it all together (took quite a while to really figure it out as I somehow had it backwards to what it should have been using the directions and had to take it all apart and do it again). I then realized I hadn't really paid any attention to the size of this template as sized how it is in the ebook you would need a card that was 8 1/4" x 7 with the fold being on the 8 1/4" side, this means you'd need 14" paper for your card base... (at least if you wanted it to actually be hidden inside thast is). Oh well, my gold pen made a bit of a mess on the first one anyways (note to self use this pen more often or it doesn't work properly right away)... resized the template and cut to fit a card 6 1/2" x 5 1/4"  much better. I also used thicker cardstock this time so the pieces were a little more durable.

    Now nobody worry, my son quickly claimed the first one after all the work I spent on it to display on his table in his room as "Mommy, I don't like this card... I love it!"

    Okay so, second one complete, card base cut, decorate front of card, go to decorate the inside... gold pen explosion everywhere!! 1 year old daughter awakens from her nap, I bring her out sand of course she immediately puts her hands in the gold pen explosion and starts making pretty handprints all over!! Thank goodness for rubbing alcohol in a spray bottle as I was able to clean the floor quickly this way, and spray a paper towel to use to clean her up.

    I look at the clock and ACK!!! the store is closing and my card isn't over there yet. Quick call to the store to make sure they're still there and she assures me that there are still a few people there at the store so they will be a little while longer there. I look at my blank inside of the card (with the exception of my 3D carousel) and sigh as there is no way I have time to decorate the inside with gold ink and some stamps now (considering I have no idea where the stamps I would think to use on it are at the moment).. Oh well, hopefully noone will notice as they'll be distracted by the carousel right?!?!

    If you made it through all that wow, thanks for your patience and I seriously hope the laugh at my disaster was worth all that reading. LOL

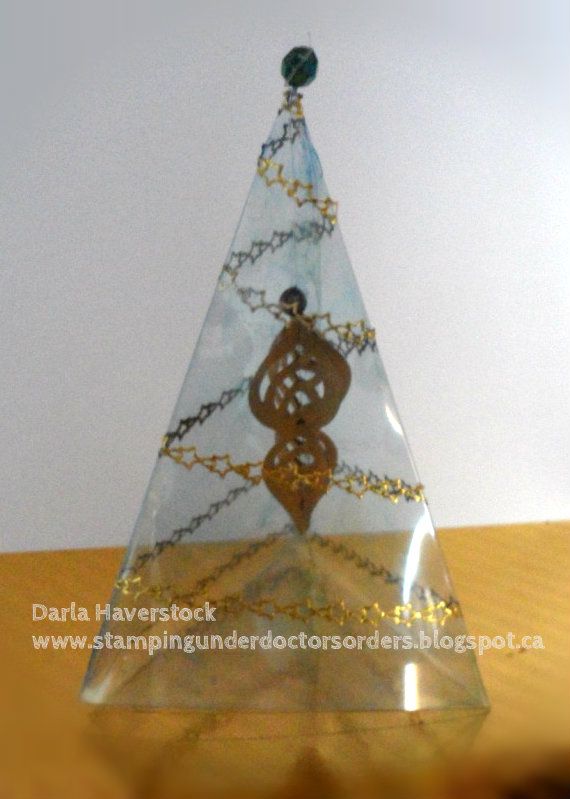
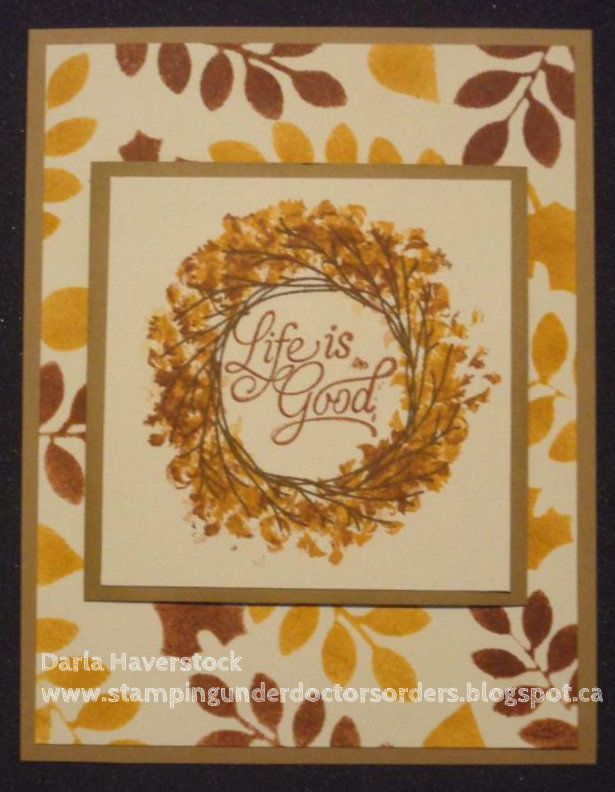
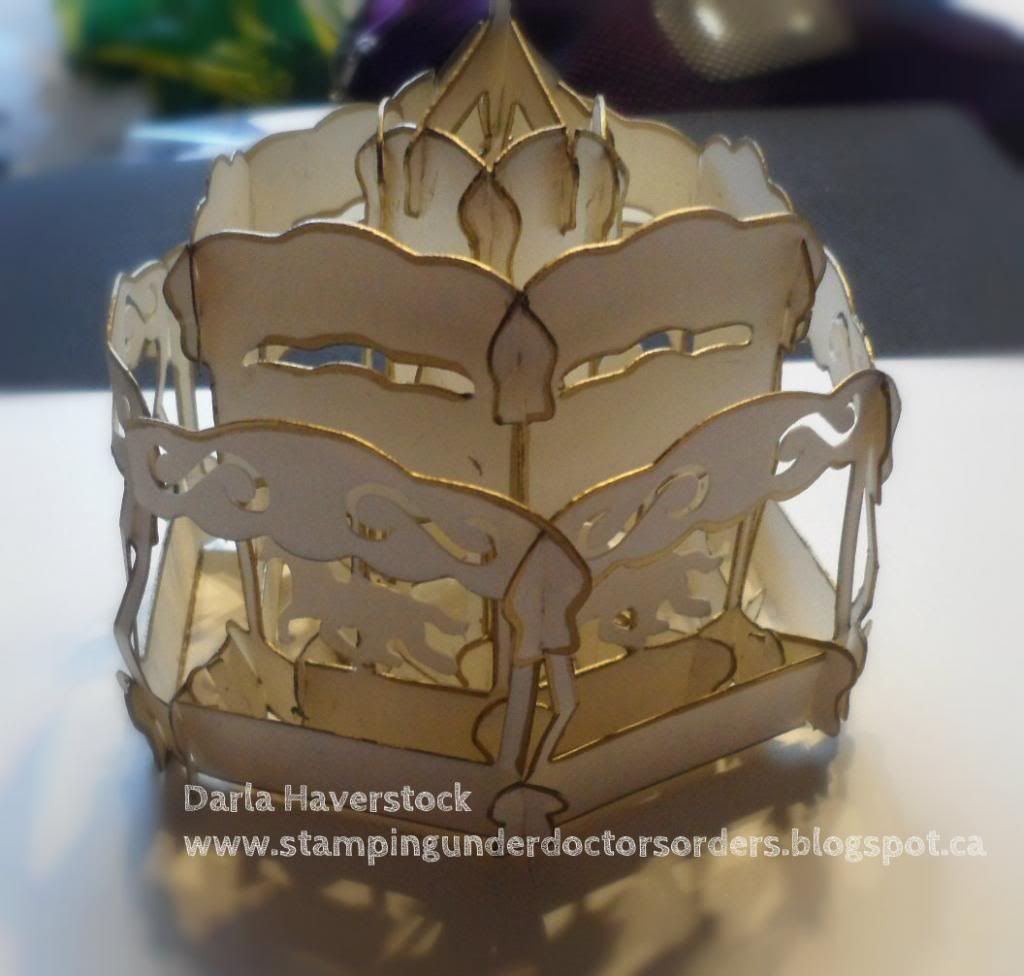
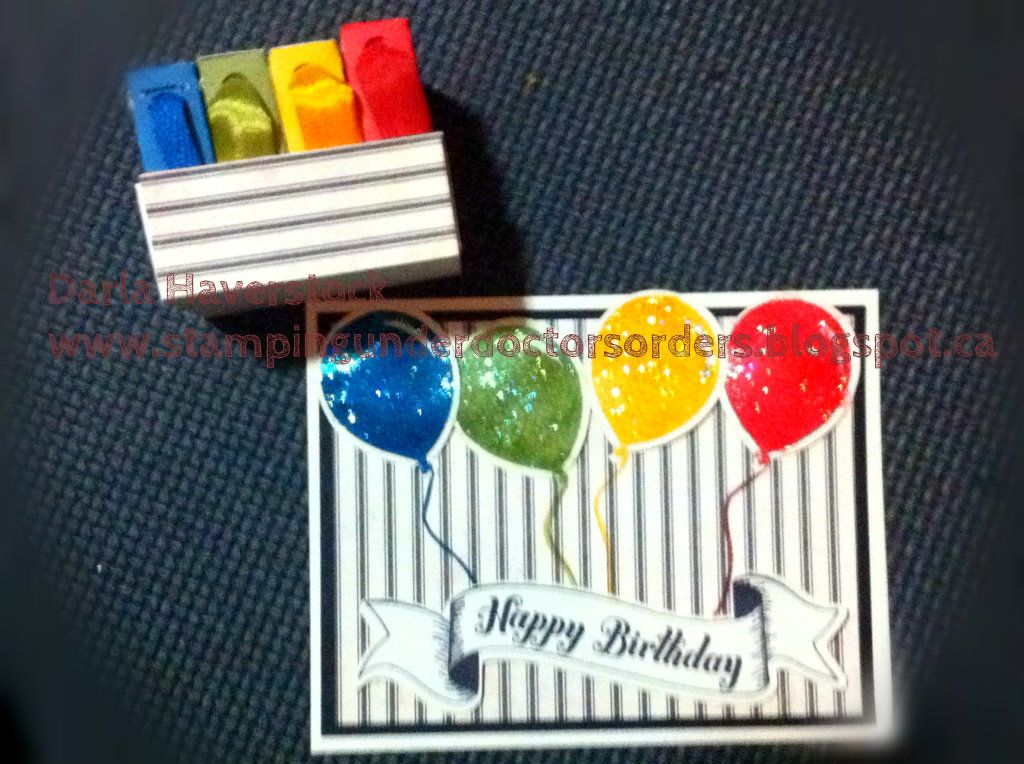
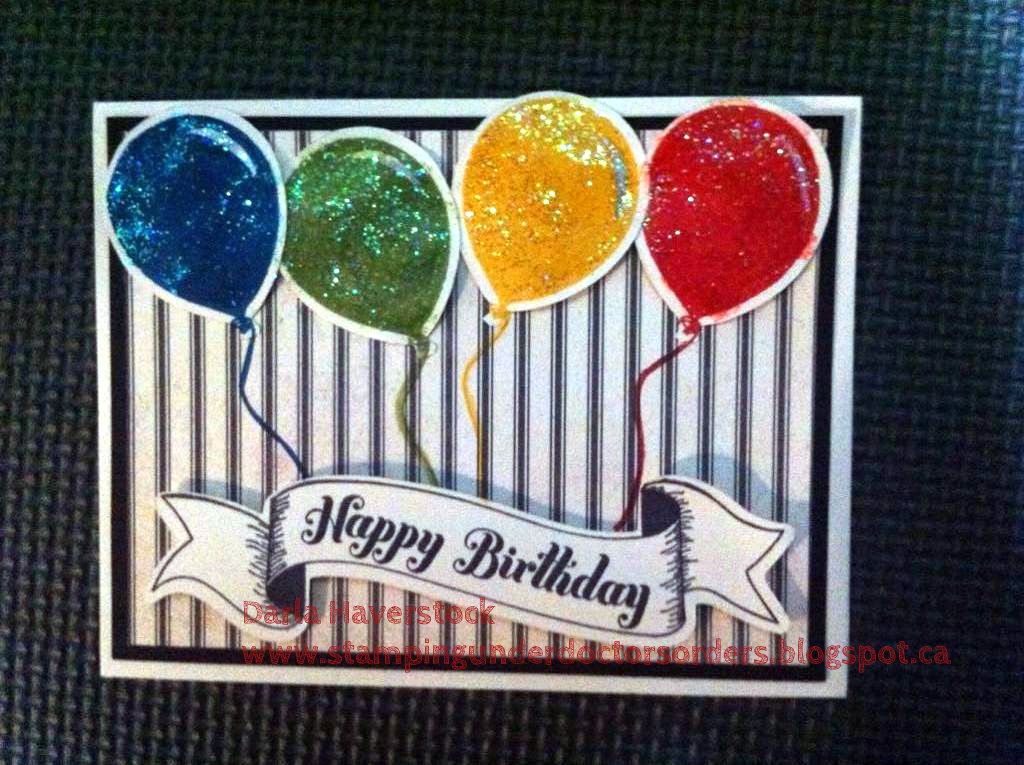
    Without further ado... here is what I came up with:


    oh and yes you caught me... I did use my cricut and the new Artiste cricut cartridge and stamps that come bundled with it for the Happy Birthday banner sentiment. 

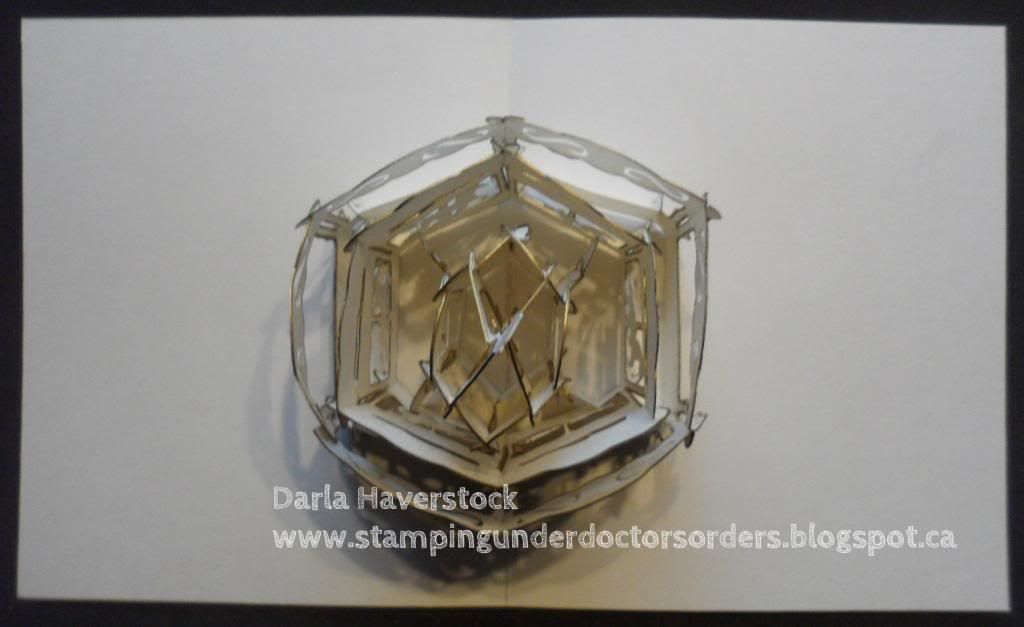
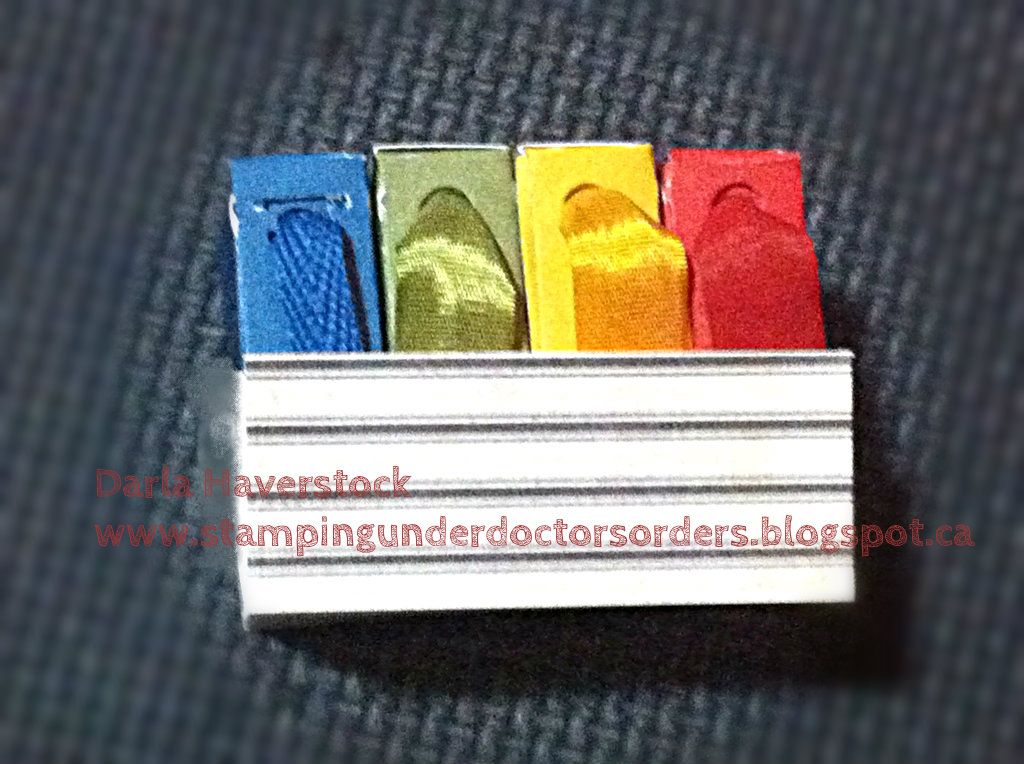
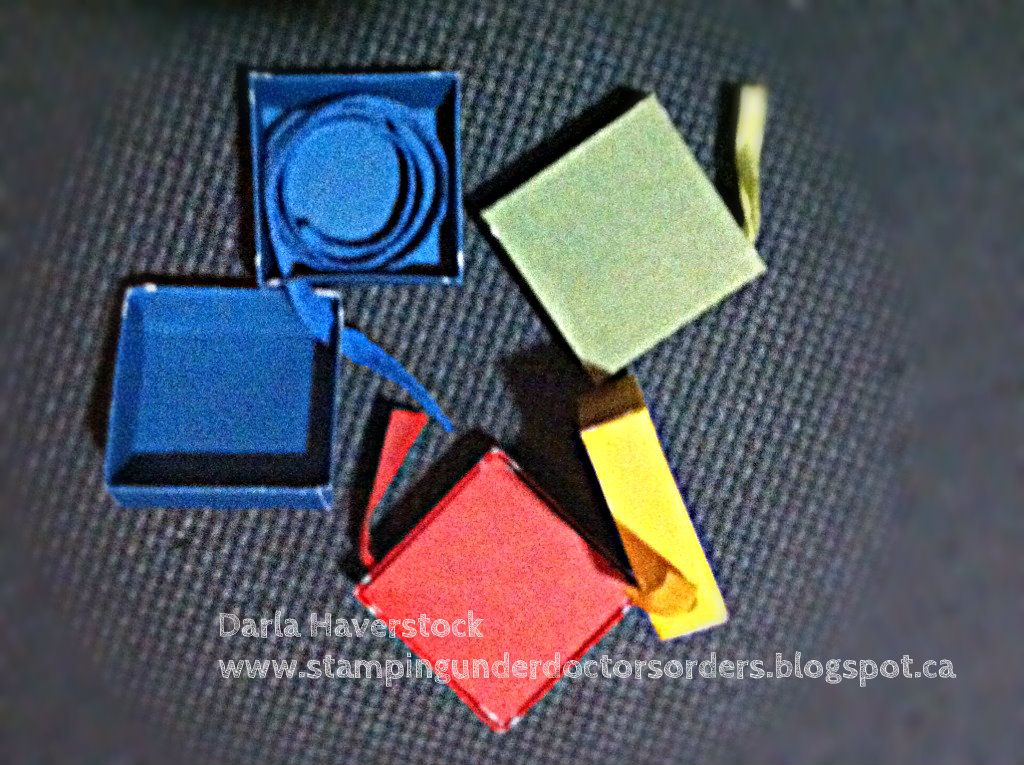
    and a few different shots of the inside:

    see my blank inside around it?? :(
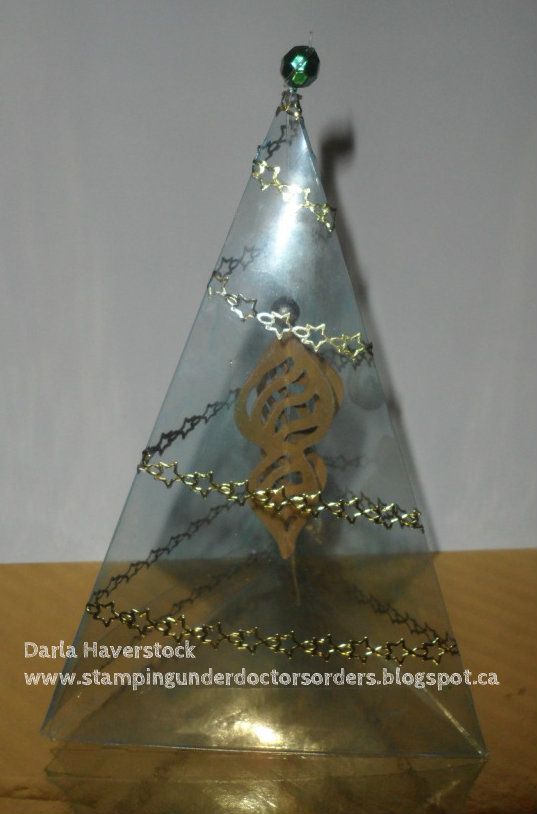

    ..and from the top


    What do you think? I  have to say I LOVED this one!! It won't be one I'll ever mass produce as it was VERY time consuming but as a stunning card for a very special person I will definitely do this again.

    Happy Birthday Dejah and Carousel Rubber Stamps!!

    Saturday, October 13, 2012

    A Very Merry Christmas SOTM blog hop


    Welcome to our October Stamp of the Month Blog Hop! This month Close to My Heart is offering a stamp set called "Very Merry Christmas". This set can be purchased exclusively through a Close to My Heart Independent Consultant for only $5 with a qualifying purchase of $50. (That’s a $17.95 value!)


    In this hop, you will see projects featuring this fun stamp set from many talented crafty ladies!
    Enjoy our blog hop - we hope we inspire you to create your “very” own Merry Christmas projects!

    We are having a giveaway – that’s right blog candy for you hoppers! Carolyn of Nuts 4 Scrappin  is giving away a stamp set to one of our hoppers! She is giving away a stamp set called "Bonjour". You can see a picture of the stamp set on her blog. All you have to do to be eligible to win is to leave a comment on each blog and become a follower of Carolyn's blog.

    If you have just hopped onto my blog, please start at the beginning at Lucy's blog – Love 2 Create. If you came from Lucy's blog – Love 2 Create then you are in the right place!


    I actually felt a little guilty about how quickly my project came together for this hop. A quick couple cuts on the cricut with my Artiste cartridge... stamp, add a little extra ink on the mittens with a sponge dauber, stick the layer together and voila. Oh and of course a little bit of Stardust Glitz glitter gel to add a bit of sparkle to the mitten. Simple and easy card but I have to say I love the result.


    Check it out:


    Oh, and a side shot to show the dimension added by using some 3D foam tape for the banner and mittens.

    Details:
    The cuts I used were all from the Artiste cartridge  They are the mitten which can be found on page 79 as well as a banner shape on page 58 that I did distort in Cricut Craft Room as I wanted it to be 3/4" x 3 1/2" but at 3/4" height it was only about 2 1/2" long so I used CCR to keep the height at 3/4" and stretch the length out.
    The card base is colonial white, 2nd layer is Cranberry and the patterned paper is from the Pear and Partridge papers. I also used some colonial white embroidery floss and a cranberry brad. The ink is all of course.. cranberry ink. Mittens and banner on 3D foam tape and a little bit of Stardust Glitz glitter gel added to the mitten for some sparkle.


    Your next stop on our Very Merry Christmas blog hops is Michelle  ~My Creations With Michelle

    SIDE NOTE: Michelle (your next stop on this hop) and I are offering an all day, 12 card Christmas class on December 1st if you're local here in Halifax, Nova Scotia. 6 cards will be designed by myself and 6 by Michelle. Contact either one of us for more info.
    If you're not local but still want to make the cards feel free to contact one of us as well as I'm sure we can arrange to put a little card kit together for you to make at home.

    Products Used:


    Here is the complete lineup in case you get lost along the way:

    1. Lucy ~ Love 2 Create
    2. Darla ~ Caution: Crafting is Contagious
    3. Michelle ~ My Creations With Michelle
    4. TinaGale ~ My Scrappy Ideas
    5. Jennifer ~ 4 Hearts Scrapbooking
    6. Carolyn  ~ Nuts 4 Scrappin'
    7. Stephanie  ~ The Quilted Scrapper
    8. Amanda ~ Scraps of Love
    Thanks for hopping along with us - we hope we were able to inspire you to create your own "Very Merry Christmas" projects.

    Saturday, October 6, 2012

    Make It From Your Heart


    Today we will show you how to Make It From Your Heart! Jeanette Lynton has created a brand NEW “how-to” program to not only guide you but also inspire you to create beautiful artwork. This amazing publication has so many different pattern blueprints that you can interpret in ANY WAY you want!
    Make It From Your Heart

    Through our blog hop, we hope to inspire you to use your own artistic instincts to interpret and create your own artwork. Each of our crafty consultants has chosen a different page of this book to create two projects for you – that’s right two projects with the SAME pattern! One project will follow the blueprint pattern as laid out. The second project will use the pattern “with a twist” to show you how versatile the patterns are.


    We are having a giveaway – that’s right blog candy for you hoppers! Lucy of Love 2 Create will be giving away a copy of the Make It From Your Heart – Volume 1. All you have to do to be eligible to win is to leave a comment on each blog.


    If you just happened to come to this blog, you should begin your hop at the beginning at Lucy's blog

    Before I even get to my project can I just say for the record that I love our new how-to book! It's very economical at only $7.95 with TONS of inspiration in it!!

    My project today uses pattern number 19 on page 42 of the new how-to book Make It From Your Heart - Volume 1..

    I saw the vertical stripes that are in this pattern as well as the smaller squares on each stripe and decided to make this card and some cute little ribbon boxes and caddy. 

    The card is made using the stamps that come bundled with the Artiste cartridge, which made it super easy to put together. I just cut out the shapes from colonial white cardstock as directed on the carrier sheet of the stamp set (love that it now includes the page # from the handbook) and stamped them accordingly. I stamped the balloons in Pacifica, Olive, Honey and Cranberry ink and after popping them up on foam tape in the middle and sticking the edges of the balloons flat down I then added some Stardust Glitz Glitter Gel. I stamped the strings directly on the card overlapping onto the balloon shape in the same colours. The Happy Birthday banner is in Black to coordinate with the stripes on the moonlight patterned paper. The banner is also on foam tape.


    I love our colour ready seam binding and as I collect re-inkers I plan to order a roll of seam binding for each and ink them up in all the colours. As you can see I don't have any pacifica reinker yet and although you can just ink it with a stamp pad I actually had some twill ribbon left from the pacifica mini-medley assortment so I put that in. I also used our new alcohol markers on the olive one just to see how it would turn out and I absolutely love how fast it dries using the alcohol marker. I wouldn't do a whole roll this way since you'll use up your markers quickly doing it that way but if you want some for a project right away and don't have time to let the ink dry overnight (which is what I would recommend if using reinker or even a stamp pad) the alcohol markers work wonderfully! 


    Since I removed the seam binding from the roll to dye it and can never manage to get it back on the roll the same way I thought it would be cute and a great way to store them all by making some boxes in the same colour paper.

    I cut the lid for the tall box on page 40 of the Artiste cartridge (shift + 3D Object + 1st row far right of the white keys or 1-10 for those that know my numbering system) at 3.5" for the top of each box and 3.4" for the bottom of each box in the various colours of cardstock and then turned Real Dial Size on and cut one at 5.5" in colonial white as a holder for all the boxes. Then I assembled the box tops and bottoms and used a hole punch to punch a hole in the same spot on the side of both top and bottom I rolled up some ribbon and put it in the box and fed the end through the bottom part first and then the top and then closed up the box. I cut a strip of the moonlight patterned paper for the front panel of my box to coordinate with my card so it could be used as a gift set (although this particular set is just my test run of how this will work for my own craft room).

    Here's a photo of the ribbon boxes in different views including one opened up so you can see how I fed the ribbon through the holes
    .


    The next stop to making it from your heart is Michelle ~ My Creations with Michelle.

    Products Used:


    Here is the list of all the talented consultants who are participating in this months blog hop:
    1. Lucy ~ Love 2 Create 
    2. Darla ~ Caution: Crafting is Contagious
    3. Michelle ~ My Creations with Michelle
    4. Maria ~ Maria's Paper Craft Place
    5. Theodora ~ Celebrate Crafts
    6. Bethany ~ Stamping at Home
    7. Stephanie ~ Quilted Scrapper
    8. Wendy ~ My Scrapbooking Blog

      
    Get widget